To configure SSH keys in Cpanel we have two options: creating a new key pair or importing an existing one. Follow the steps below depending on your choice.
Generating a new key
To generate a new SSH key pair for your account, follow these steps:
1. Log in to your cPanel account
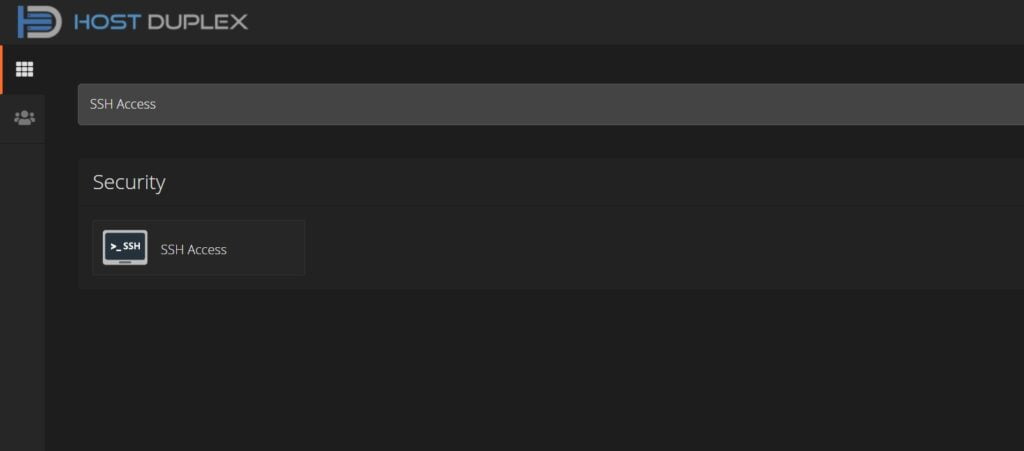
2. Look for SSH Keys. You can find it by scrolling down to the Security section or by using the search bar
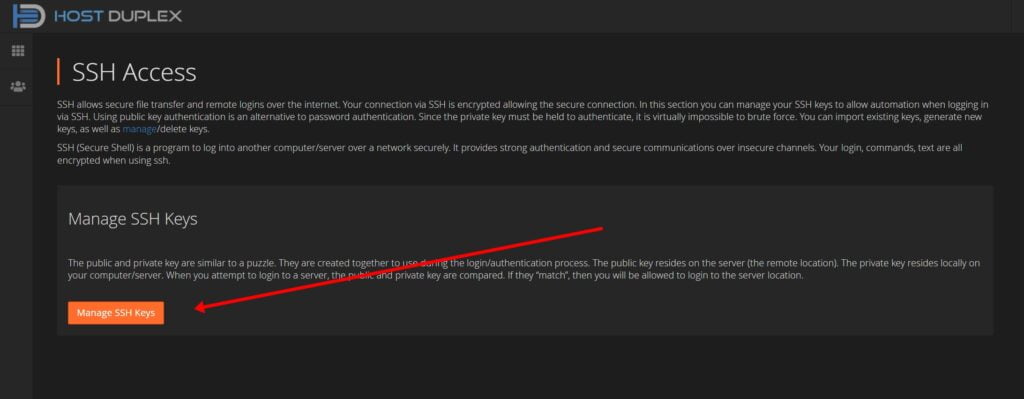
3. Click on Manage SSH Keys
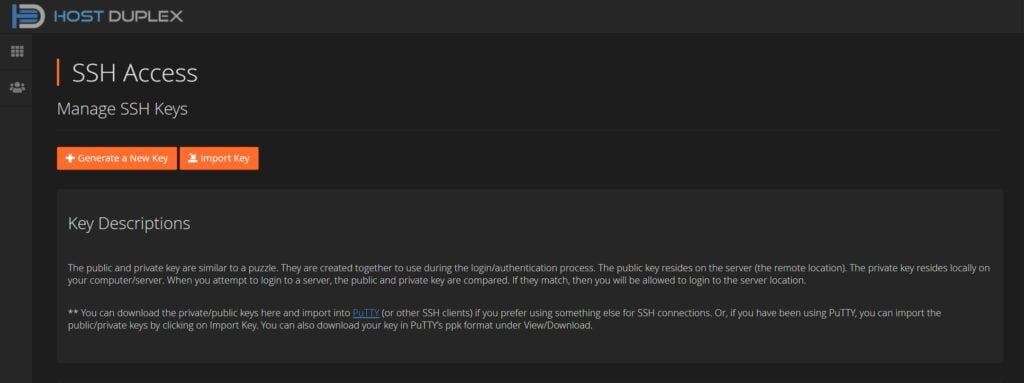
4. Click Generate a New Key
5. Make sure the Key Name is set to id_rsa
6. Type in a password for the key. Alternatively, you can use the Password Generator
7. Confirm the Key Type is set to RSA
8. Confirm the Key Size is set to 2048
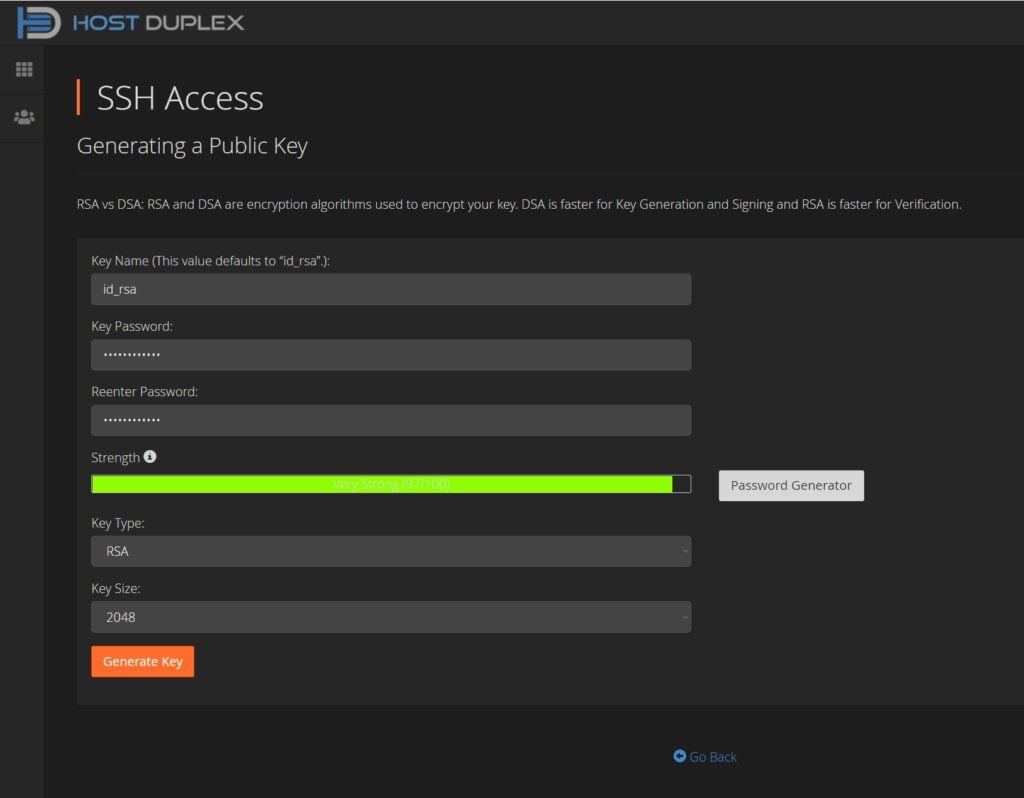
9. Click Generate Key. cPanel generates the public and private keys and saves them in the /home/username/.ssh directory
10. Click Go Back at the bottom
11. Under Public Keys, locate the name of the key you just created. Under Actions, click Manage
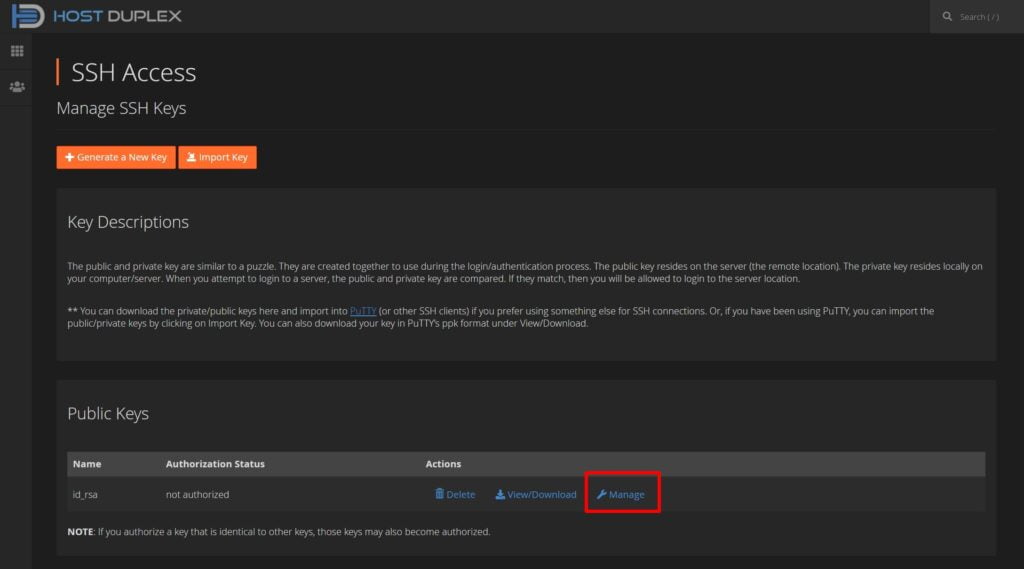
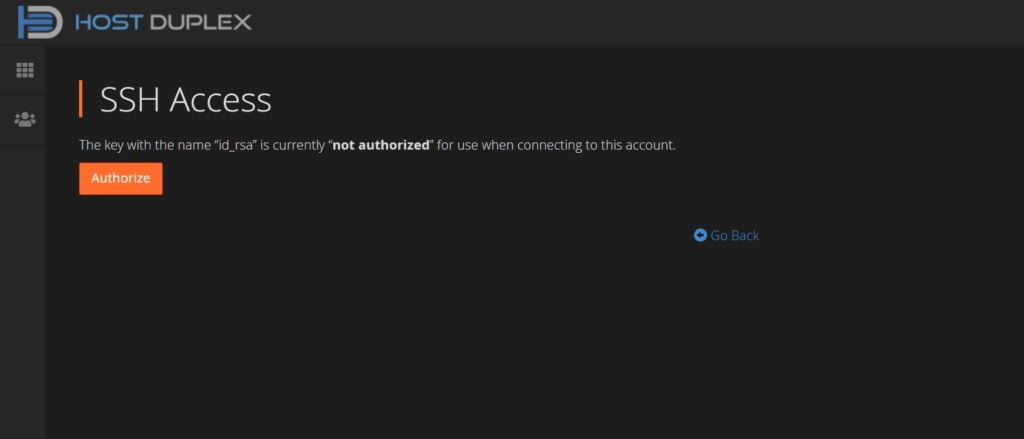
12. Click Authorize, and then click Go Back. To connect to your account using the new key, read Connecting to your account using the SSH keys below
Importing an existing key
If you have already generated SSH keys for your account and want to re-use them, you can use cPanel to import them. To do this, follow these steps:
1. Log in to your cPanel account
2. Look for SSH Keys. You can find it by scrolling down to the Security section or by using the search bar
3. Click on Manage SSH Keys

4. Click Import Key

5. Fill in the empty fields
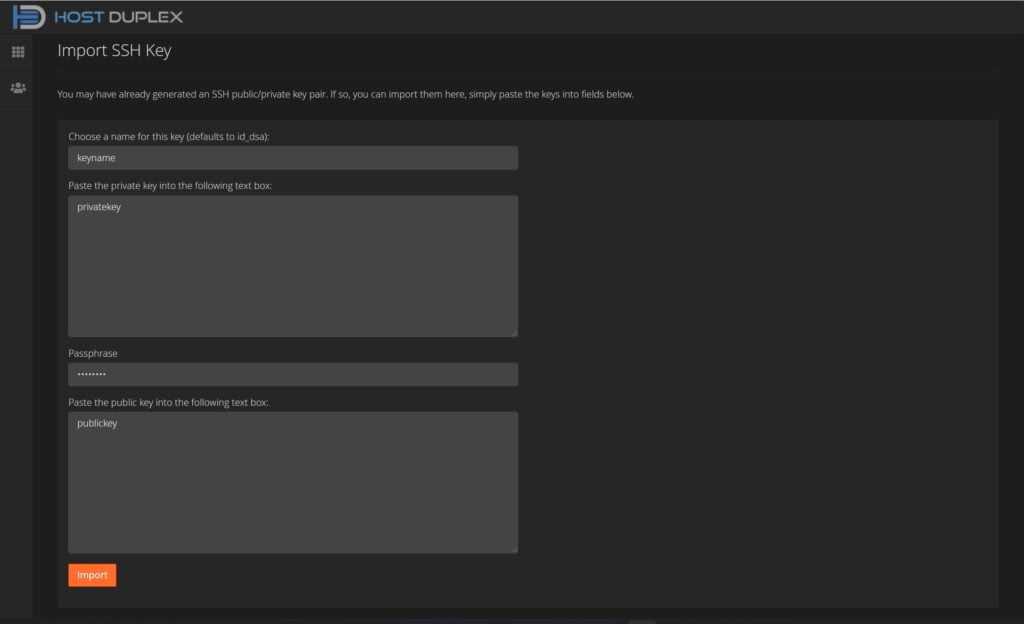
6. Click on Import
7. Go back to Manage Keys. Under Public Keys, locate the one you just imported and click on Manage
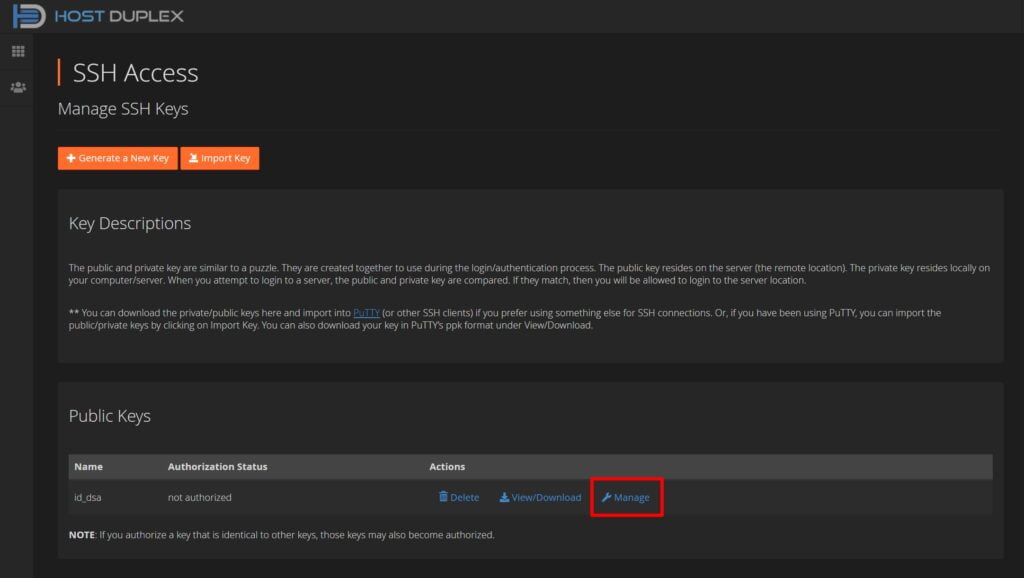
8. Click Authorize and then Go Back
Connecting to your account using Mac OS X
Before you can connect to your account, you must deploy the private key to your local computer (unless you imported a public key into cPanel, in which case you presumably already have the private key on your computer). To do this, follow these steps:
1. Log in to your cPanel account
2. Look for SSH Keys. You can find it by scrolling down to the Security section or by using the search bar
3. Click on Manage SSH Keys

4. Under Private Keys, locate the key you want to use and click on View/Download

5. You will see the following screen. Simply click on Download and then save the id_rsa file on your local computer in the /home/username/.ssh directory. Replace username with your own username
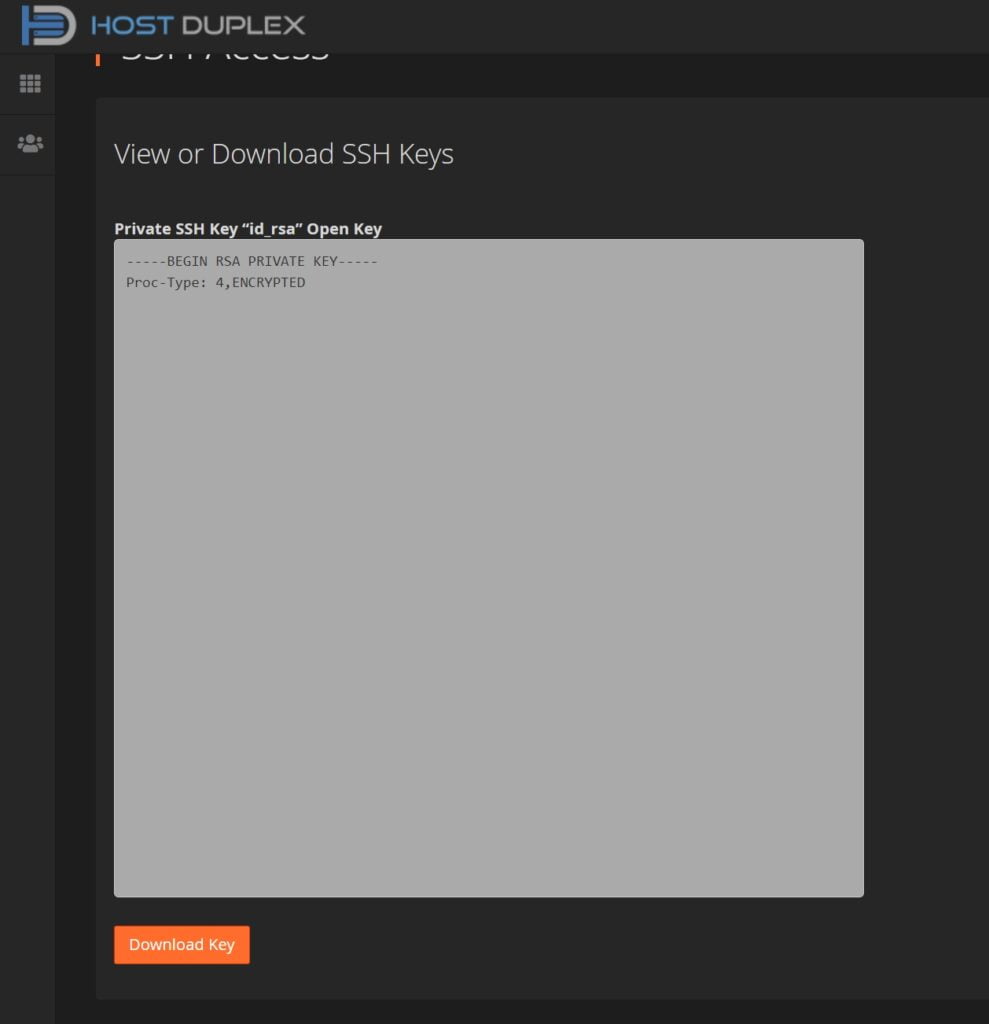
Now, to connect to your SSH account using the keys, follow these steps:
1. Open your Terminal. You can do so by browsing your applications on using the Finder
2. At the command prompt, type the following command. Replace username with your A2 Hosting username, and replace example.com with your site’s domain name:
ssh -p 7822 username@example.com
3. The SSH client should connect without asking you to type your account password. If you set a passphrase for the key, however, you must type the key passphrase.
If you are a Host Duplex customer and still have questions, please open a ticket in the Host Duplex client portal.
