The DNS_PROBE_FINISHES_NXDOMAIN is an error specific to Google Chrome. It indicates there’s an issue with your DNS or something’s misconfigured. This article will walk you through some of the most common solutions.
Variations
The DNS_PROBE_FINISHED_NXDOMAIN can look different depending on the browser you’re using. Here are some of the most common variations.
- On Moxilla Firefox:
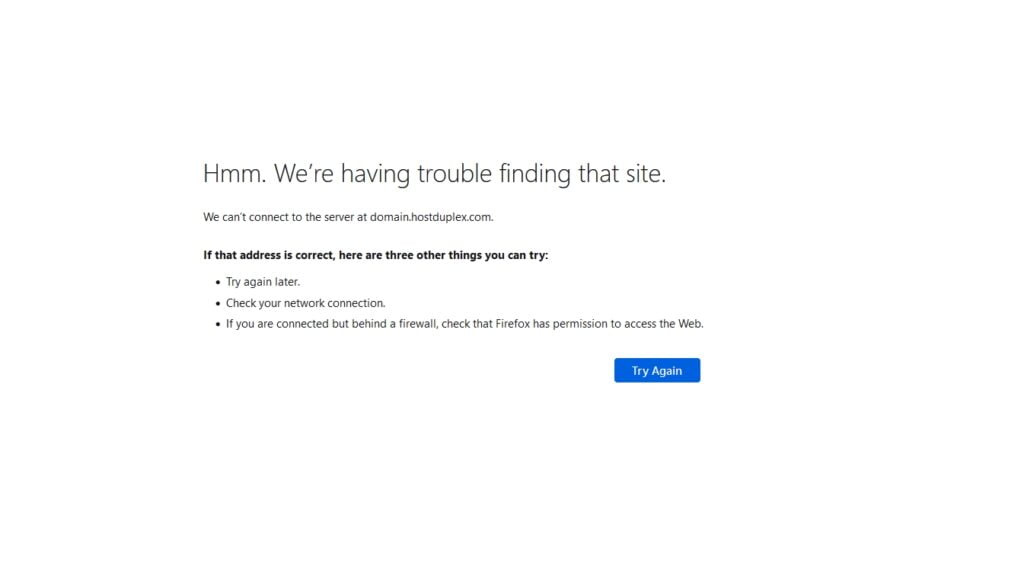
- On Microsoft Edge:

How to fix it?
1. Release and renew IP address
The very first thing you should do is releasing and renewing the IP address on your computer. This also includes flushing your local DNS cache, which is similar to browser cache.
For Windows users
1. Using your Windows search tool, look for the Command Prompt.

2. Type in ipconfig /release and hit Enter. This will release your current IP address.
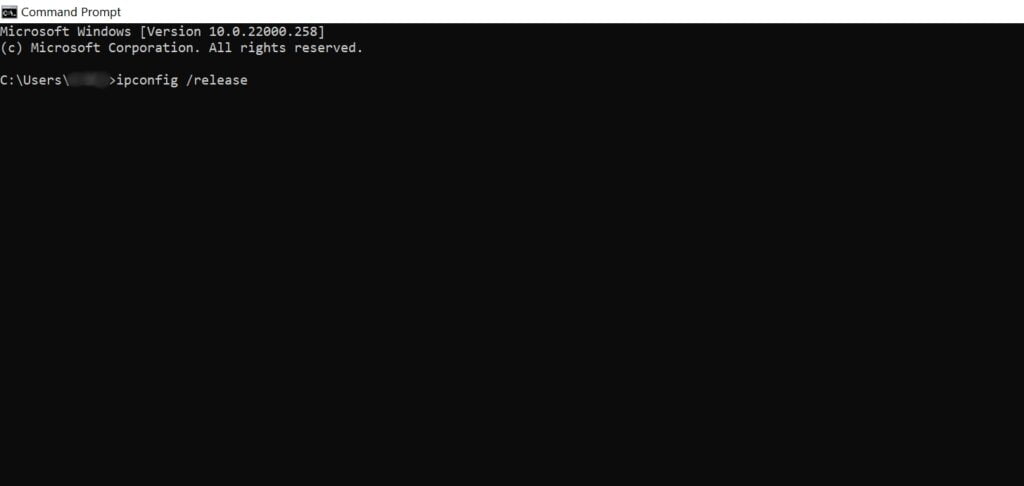
3. Then type in ipconfig /flushdns and hit Enter. This will flush your local DNS cache. You should see a “Successfully flushed the DNS resolver Cache” message if it worked.
4. Lastly, type in ipconfig /renew and hit Enter. This will renew your IP address.
For Mac users
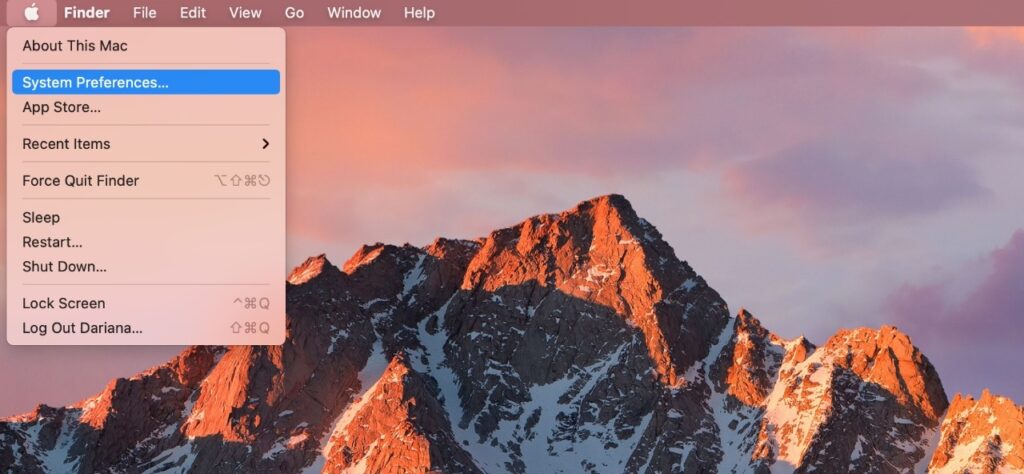
1. Go to System Preferences
2. Click on the Network icon
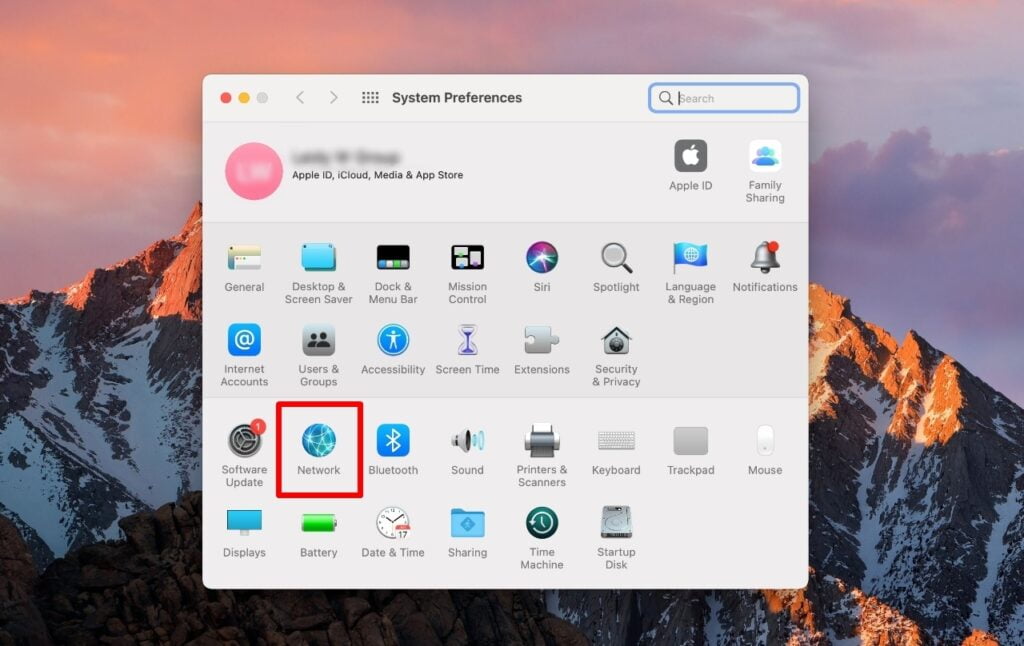
3. Click on the Advanced… button
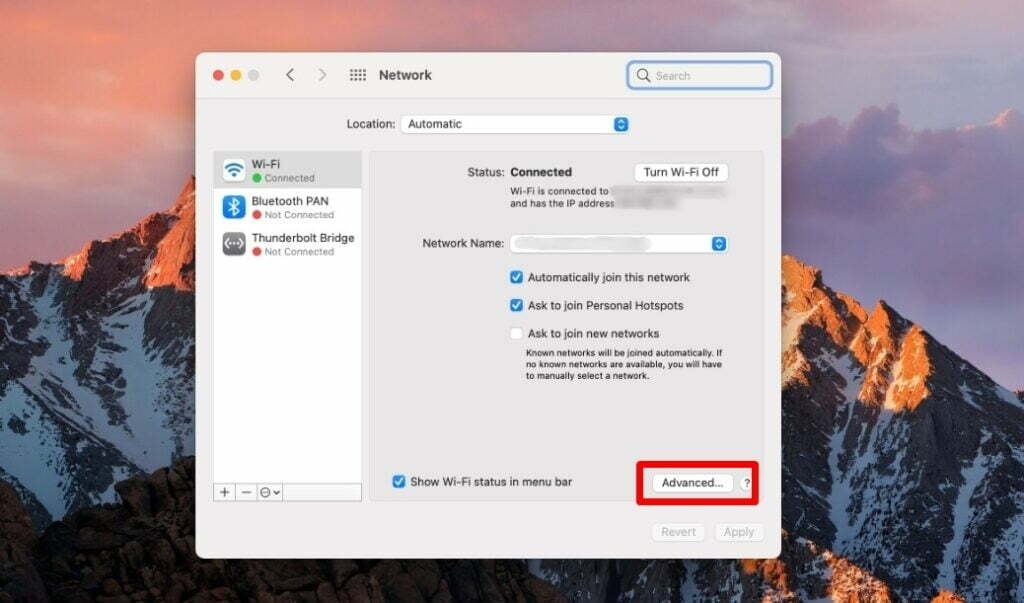
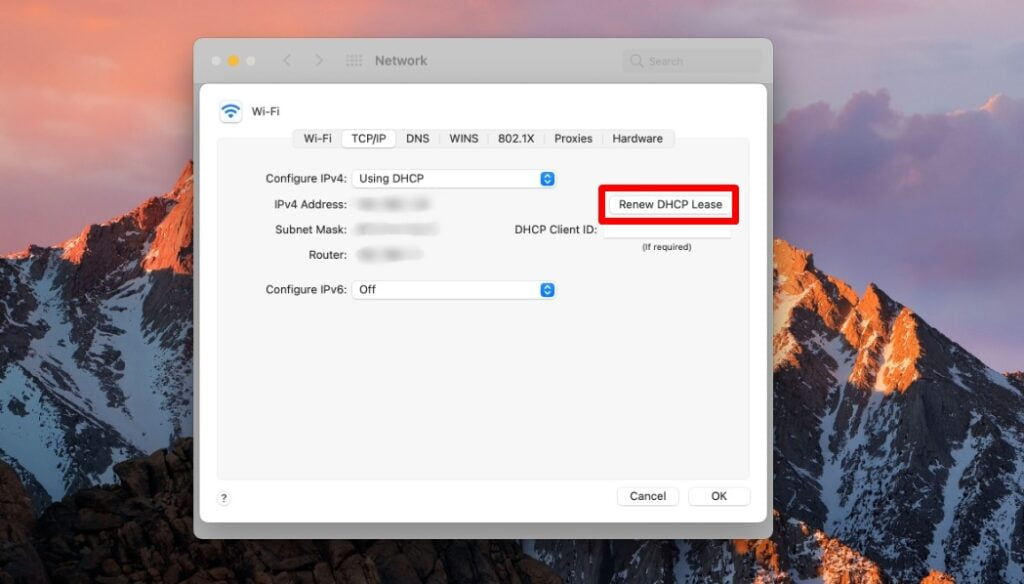
4. Go to the TCP/IP tab. Then click on the Renew DHCP lease button.
2. Restart the DNS client service
If you’re using Windows, you can try restarting the DNS client service. This resolves and caches DNS domain names.
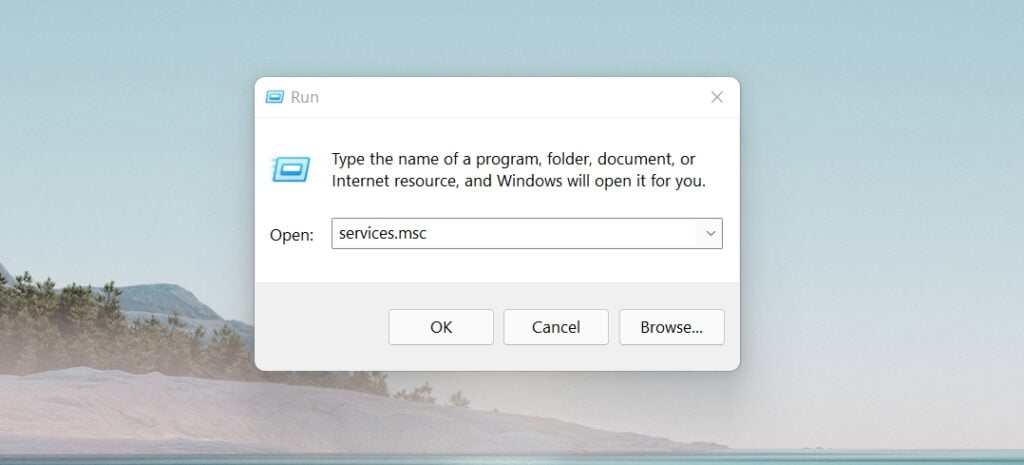
1. Open up the Run command by pressing the Windows logo key and R. Then type “services.msc” and hit Enter.
2. Scroll down to until you see “DNS Client”. Right click on it and select Restart

If the restart option is greyed out, you can use the following commands on the command prompt.
net stop dnscache
net start dnscache
3. Change DNS Servers
DNS servers are automatically assigned by your internet service provider, but you could try temporarily changing these to a public DNS server, such as Google or Cloudflare.
- Some prefer to use Google’s public DNS (8.8.8.8 and 8.8.4.4) long-term due to them sometimes being more reliable.
- Cloudflare also has public DNS (1.1.1.1 and 1.0.0.1).
For Windows users:
- Open your control panel.
2. Go to Network and Internet
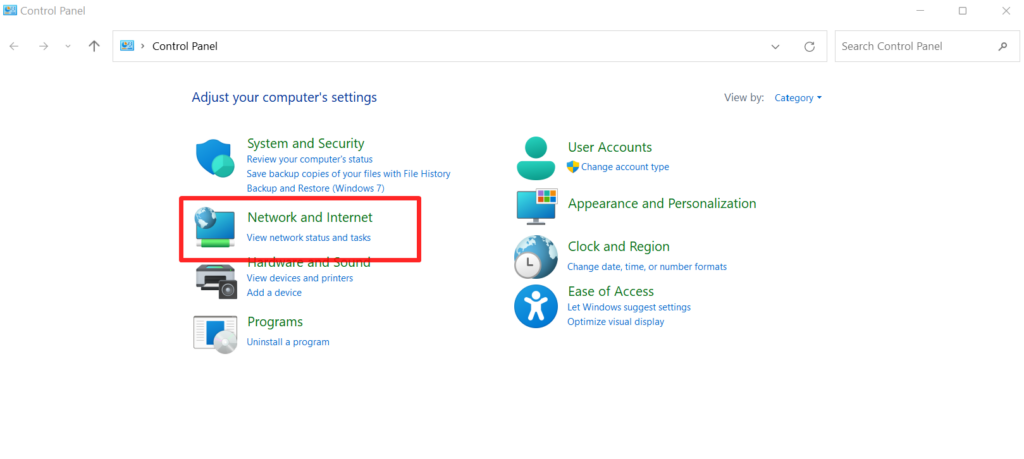
3. Click on Network and Sharing Center
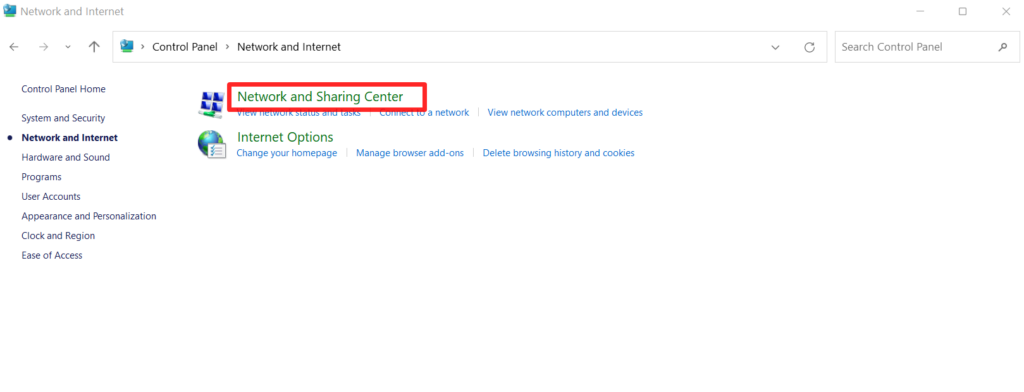
4. On the left side, click on Change Adapter Settings.
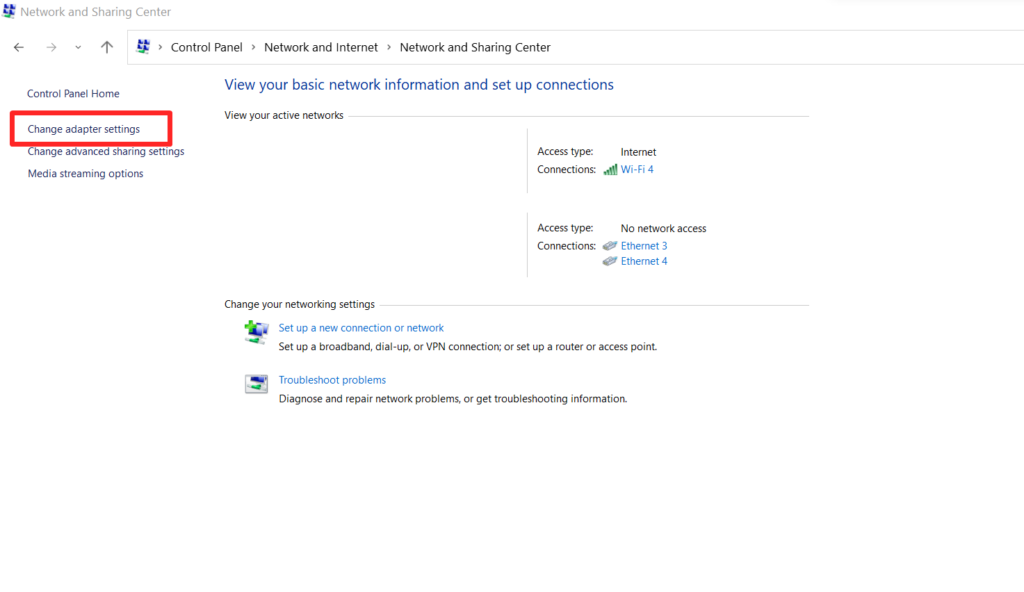
5. Right click on your current connection and then on Properties.
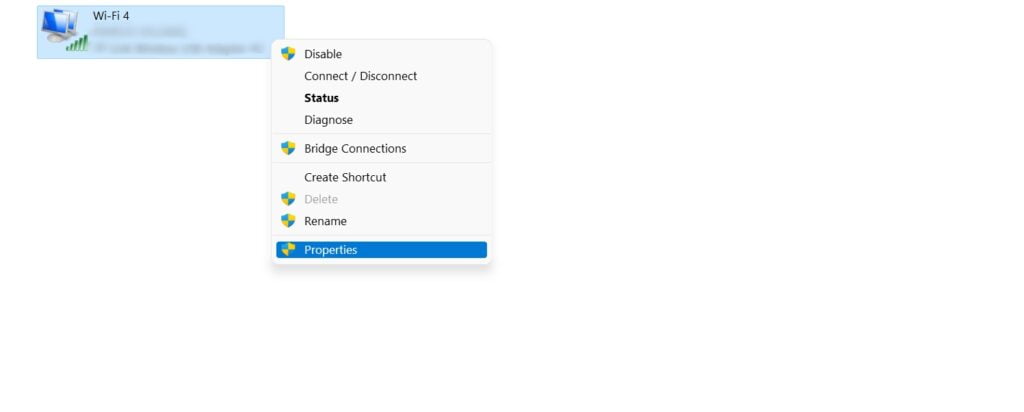
6. From the list, select Internet Protocol Version 4 and click on Properties.
7. Click on Use the following DNS server addresses and enter the new DNS server addresses.
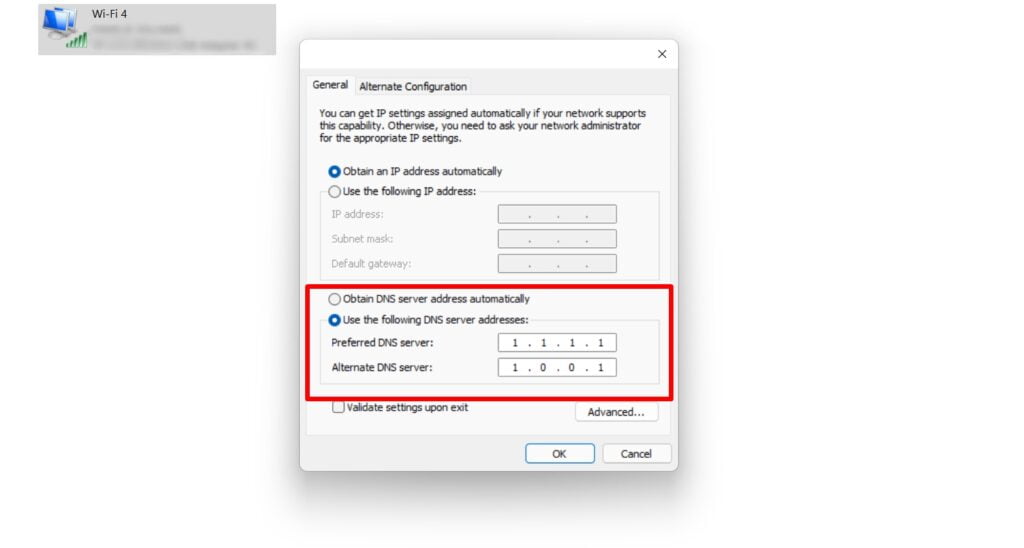
9. Click OK and close your control panel. Restart your browser.
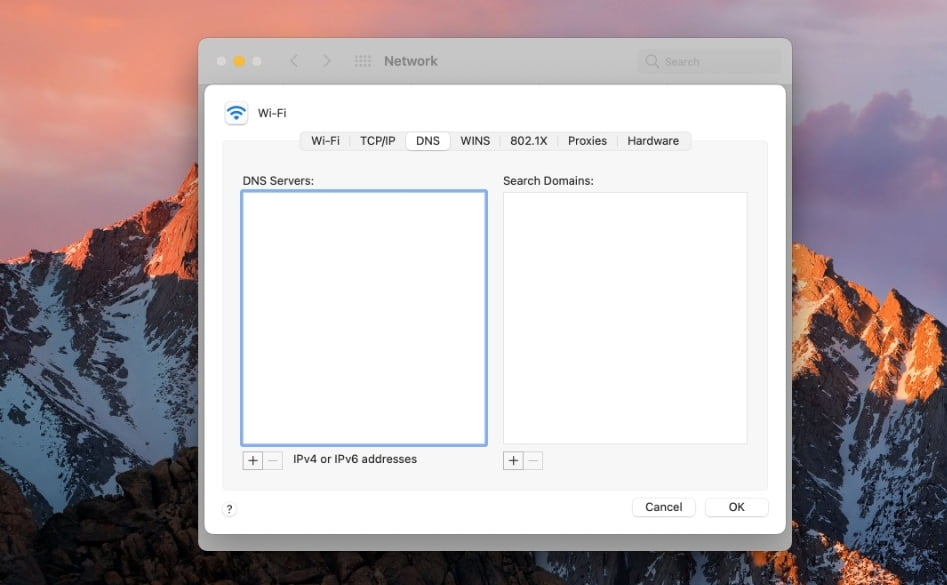
For Mac users:
1. Go to System Preferences…

2. Click on the Network icon.

3. Click on the Advanced… button.

4. Click on the DNS tab and add the new server adresses and click OK.
4. Reset Chrome Flags
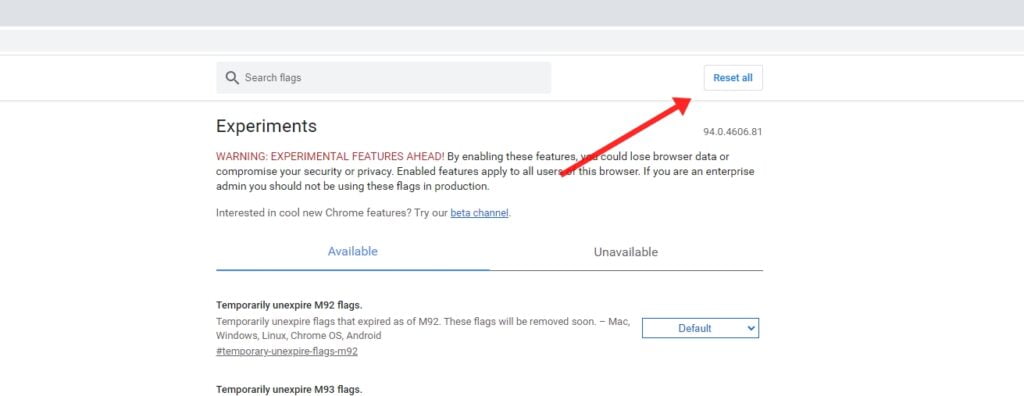
Maybe the issue is within your Chrome’s configuration. Chrome flags are experimental features that can sometimes mess up your browser. You can reset these back to default by entering chrome://flags into the address bar and clicking on the Reset all to default bottom that’s on the top right.
5. Disable VPN and Antivirus Temporarily
VPNs and Antivirus software can override your network settings, including your DNS servers. If you have any running, you can try temporarily disabling them or closing them to see if it fixes the issue.
6. Check the DNS settings of your domain
If you’re only getting the DNS_PROBE_FINISHED_NXDOMAIN error on a single domain, even after checking your hosts file, you might need to check the DNS settings on the domain name itself. If you don’t have access to the DNS settings, contact your hosting provider and inform them of the issue.
7. Restart your computer
If the above methods didn’t solve the issue, try restarting your computer and router. As simple as it may sound, if you haven’t tried restarting your computer and internet connection, this could be the solution to your problem.
