
The DNS cache is a temporary database on your computer that stores recent DNS lookups. This enables your browser to resolve these lookups faster, thereby cutting down web page loading times. Overtime, these records can become outdated or corrupted, so clearing your Mac’s DNS cache can help if you’re having issues connecting to some websites.
Luckily, this process is easy and will only take a minute of your time!
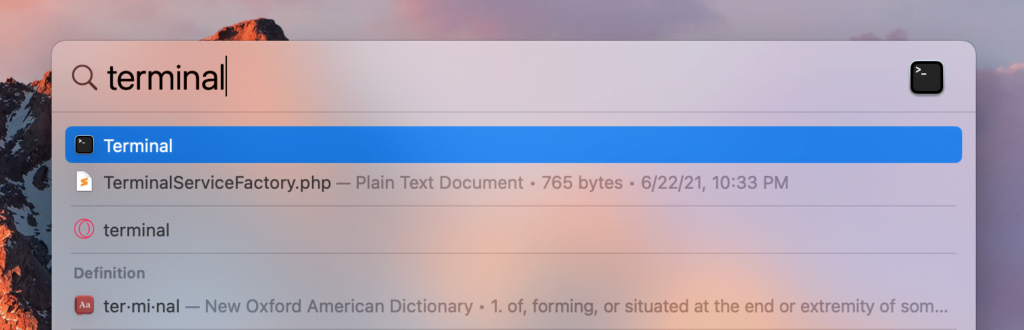
1. Click the Spotlight search button or use Command+Space to search for Terminal
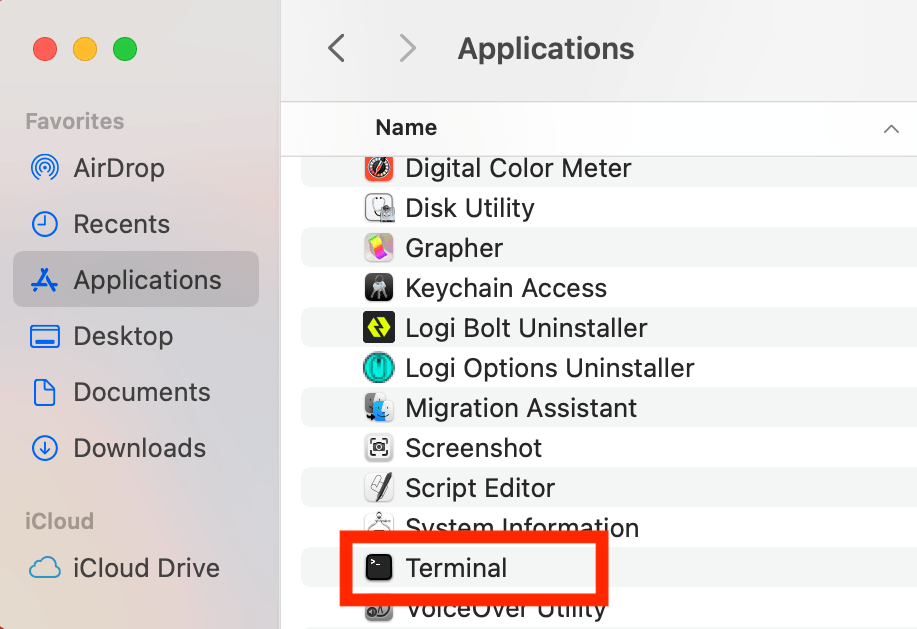
You can also navigate to Go > Utilities > Terminal or click Applications, open the Utilities folder and then double-click Terminal
2. Once the terminal is open, enter the following command
sudo dscacheutil -flushcache; sudo killall -HUP mDNSResponder
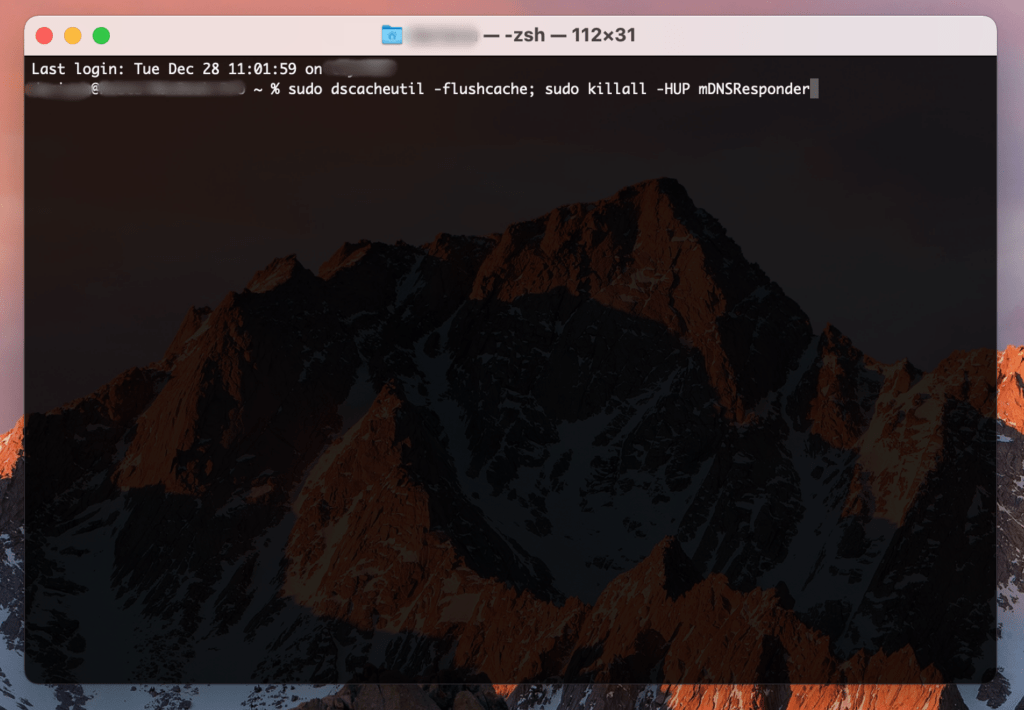
3. Enter your Mac’s password and then press Enter to clear the DNS cache

For older macOS versions:
- In macOS El Capitan or newer, run sudo killall -HUP mDNSResponder
- For macOS Yosemite, enter sudo discoveryutil udnsflushcaches
- In Mac OS Lion, Mountain Lion and Mavericks, the command is sudo killall -HUP mDNSResponder
- In Mac OS Snow Leopard, enter sudo dscacheutil –flushcache
- For MacOS Leopard, run sudo lookupd –flushcache
- And in Mac OS Tiger, use lookupd –flushcache
If you are a Host Duplex customer and still have questions, please open a ticket in the Host Duplex client portal.